
Electronics#ar #VR #AR Glasses #Augmented Reality #Virtual Reality #techtok #cftech
Use this section to provide a description of your blog./pages/blog
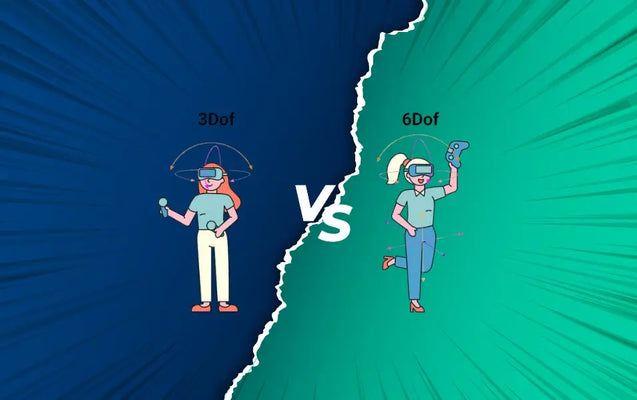
What is the comparison 3DoF to 6DoF to 9DoF in AR glasses ?
Posted by Technology Co., Ltd Shenzhen Mshilor
- 3DoF: Tracks only head rotation (yaw/left-right, pitch/up-down, roll/tilt). No body position tracking.
- 6DoF: Tracks rotation + position (forward/back, left/right, up/down). Full head pose in real space.
- 9DoF: Not “extra movement freedom”—it’s a sensor fusion term. Combines 3-axis gyroscope + 3-axis accelerometer + 3-axis magnetometer (9-axis IMU). Improves accuracy and reduces drift in 3DoF or 6DoF systems. In practice, it’s marketing-speak for “more precise 6DoF” in many AR glasses.
|
Feature
|
3DoF (Your BB glasses today)
|
6DoF (Next-level spatial AR)
|
9DoF (Precision-enhanced)
|
|---|---|---|---|
|
What it tracks
|
Head rotation only (pitch/yaw/roll)
|
Rotation + translation (x/y/z position)
|
9-axis IMU fusion for ultra-stable orientation + position
|
|
Screen behavior
|
Body-anchored or smooth-follow (screens stay relative to you)
|
World-anchored (screens stay fixed in real space even if you walk)
|
Same as 6DoF but with less drift & better heading accuracy
|
|
Multi-screen immersion
|
Excellent for productivity/video (multiple stable floating monitors)
|
Truly spatial—screens can be placed on walls, tables, or objects
|
Highest precision for anchored multi-windows + overlays
|
|
Motion sickness risk
|
Low (gentle, predictable)
|
Higher if tracking is poor; otherwise, very natural
|
Lowest drift = smoothest experience
|
|
Hardware needed
|
Basic IMU (gyro + accel) + companion device (e.g., Beam)
|
Cameras + advanced IMU + SLAM/VIO inside-out tracking
|
9-axis IMU (often paired with visual tracking for full 6DoF)
|
|
Best for
|
Every day multitasking, video, 3D content on BB glasses
|
Gaming, navigation, object interaction, true AR
|
High-accuracy enterprise, robotics, or premium consumer AR
|
|
Current examples
|
XREAL Air/One series + Beam Pro, RayNeo Air 4 Pro, Viture (most BB glasses)
|
Snap Spectacles 5, Magic Leap 2, Meta Orion prototypes, some XREAL upgrades
|
Many “6DoF” glasses marketed with 9DoF IMUs for stability
|
|
Cost & Availability
|
Affordable & widely available now (your BB setup)
|
More expensive, emerging in 2025–2026 consumer models
|
Usually bundled into premium 6DoF systems
|
- 3DoF (what you have now): Your multi-screen experience is already “more immersive” than basic mirroring because screens follow your body smoothly when you turn your head. Great for sitting at a desk or couch—feels like giant persistent monitors. No need to walk around for it to work perfectly.
- 6DoF upgrade: Walk across the room, and virtual screens stay exactly where you placed them in the real world (e.g., one on the wall, one floating by the window). Perfect for room-scale productivity or AR apps that interact with physical objects. Many BB glasses can be upgraded to 6DoF via accessories or future firmware.
- 9DoF benefit: Adds a magnetometer so direction doesn’t drift over time (common 3DoF/6DoF issue indoors). You get rock-solid anchors without recalibrating—especially useful in 6DoF systems for long sessions or outdoor use.
Most consumer BB AR glasses (like your setup) start with excellent 3DoF spatial computing because it’s lightweight, low-power, and perfect for multi-screen immersion without bulk. 6DoF is the future for true “spatial computing” (world-locked AR), and 9DoF is the hidden tech making both feel buttery-smooth. If you love your current multi-screen workflow, 3DoF is more than enough today—6DoF is the upgrade path when you want to move with your content.

Read more
- 3DoF: Tracks only head rotation (yaw/left-right, pitch/up-down, roll/tilt). No body position tracking.
- 6DoF: Tracks rotation + position (forward/back, left/right, up/down). Full head pose in real space.
- 9DoF: Not “extra movement freedom”—it’s a sensor fusion term. Combines 3-axis gyroscope + 3-axis accelerometer + 3-axis magnetometer (9-axis IMU). Improves accuracy and reduces drift in 3DoF or 6DoF systems. In practice, it’s marketing-speak for “more precise 6DoF” in many AR glasses.
|
Feature
|
3DoF (Your BB glasses today)
|
6DoF (Next-level spatial AR)
|
9DoF (Precision-enhanced)
|
|---|---|---|---|
|
What it tracks
|
Head rotation only (pitch/yaw/roll)
|
Rotation + translation (x/y/z position)
|
9-axis IMU fusion for ultra-stable orientation + position
|
|
Screen behavior
|
Body-anchored or smooth-follow (screens stay relative to you)
|
World-anchored (screens stay fixed in real space even if you walk)
|
Same as 6DoF but with less drift & better heading accuracy
|
|
Multi-screen immersion
|
Excellent for productivity/video (multiple stable floating monitors)
|
Truly spatial—screens can be placed on walls, tables, or objects
|
Highest precision for anchored multi-windows + overlays
|
|
Motion sickness risk
|
Low (gentle, predictable)
|
Higher if tracking is poor; otherwise, very natural
|
Lowest drift = smoothest experience
|
|
Hardware needed
|
Basic IMU (gyro + accel) + companion device (e.g., Beam)
|
Cameras + advanced IMU + SLAM/VIO inside-out tracking
|
9-axis IMU (often paired with visual tracking for full 6DoF)
|
|
Best for
|
Every day multitasking, video, 3D content on BB glasses
|
Gaming, navigation, object interaction, true AR
|
High-accuracy enterprise, robotics, or premium consumer AR
|
|
Current examples
|
XREAL Air/One series + Beam Pro, RayNeo Air 4 Pro, Viture (most BB glasses)
|
Snap Spectacles 5, Magic Leap 2, Meta Orion prototypes, some XREAL upgrades
|
Many “6DoF” glasses marketed with 9DoF IMUs for stability
|
|
Cost & Availability
|
Affordable & widely available now (your BB setup)
|
More expensive, emerging in 2025–2026 consumer models
|
Usually bundled into premium 6DoF systems
|
- 3DoF (what you have now): Your multi-screen experience is already “more immersive” than basic mirroring because screens follow your body smoothly when you turn your head. Great for sitting at a desk or couch—feels like giant persistent monitors. No need to walk around for it to work perfectly.
- 6DoF upgrade: Walk across the room, and virtual screens stay exactly where you placed them in the real world (e.g., one on the wall, one floating by the window). Perfect for room-scale productivity or AR apps that interact with physical objects. Many BB glasses can be upgraded to 6DoF via accessories or future firmware.
- 9DoF benefit: Adds a magnetometer so direction doesn’t drift over time (common 3DoF/6DoF issue indoors). You get rock-solid anchors without recalibrating—especially useful in 6DoF systems for long sessions or outdoor use.
Most consumer BB AR glasses (like your setup) start with excellent 3DoF spatial computing because it’s lightweight, low-power, and perfect for multi-screen immersion without bulk. 6DoF is the future for true “spatial computing” (world-locked AR), and 9DoF is the hidden tech making both feel buttery-smooth. If you love your current multi-screen workflow, 3DoF is more than enough today—6DoF is the upgrade path when you want to move with your content.
Read more
What About the BB AR glasses (referring to birdbath optics AR glasses) with 3DoF spatial computing?
Posted by Technology Co., Ltd Shenzhen Mshilor

When paired with a companion device (e.g., XREAL Beam Pro) or built-in spatial chip, it unlocks true spatial computing features:
- Stable floating displays — Virtual screens stay anchored in front of you or around your body instead of rigidly locked to your exact gaze (0DoF mode).
- Multi-screen / multi-window mode — You can open several virtual monitors (e.g., one for video, one for work, one for chat) and they remain positioned in your field of view even as you turn your head. No more screens “stuck” to your forehead.
-
Intuitive interaction modes like:
- Body Anchor — Screens follow your body movement smoothly.
- Smooth Follow — Gentle tracking that feels natural.
- Side View / World Anchor — Content stays put in the room for glances.

|
Feature
|
0DoF (Basic)
|
3DoF Spatial Computing
|
Benefit for Users
|
|---|---|---|---|
|
Screen behavior
|
Locked to head (HUD style)
|
Stays in place or body-anchored
|
Less motion sickness, more natural multitasking
|
|
Multi-screen
|
Single floating window only
|
Multiple stable windows
|
Like having 3–5 extra monitors anywhere
|
|
Head movement
|
Everything moves with you
|
Screens stay where you placed them
|
Feels like real physical displays
|
|
Use cases
|
Simple video mirroring
|
Productivity, gaming, 3D content
|
Significantly more “wow” factor
|
Summarize:
: BB AR glasses + 3DoF give you the best balance of comfort, price, and immersion for everyday spatial multitasking today — virtual screens that actually feel like they exist in your world.Read more
When paired with a companion device (e.g., XREAL Beam Pro) or built-in spatial chip, it unlocks true spatial computing features:
- Stable floating displays — Virtual screens stay anchored in front of you or around your body instead of rigidly locked to your exact gaze (0DoF mode).
- Multi-screen / multi-window mode — You can open several virtual monitors (e.g., one for video, one for work, one for chat) and they remain positioned in your field of view even as you turn your head. No more screens “stuck” to your forehead.
-
Intuitive interaction modes like:
- Body Anchor — Screens follow your body movement smoothly.
- Smooth Follow — Gentle tracking that feels natural.
- Side View / World Anchor — Content stays put in the room for glances.
|
Feature
|
0DoF (Basic)
|
3DoF Spatial Computing
|
Benefit for Users
|
|---|---|---|---|
|
Screen behavior
|
Locked to head (HUD style)
|
Stays in place or body-anchored
|
Less motion sickness, more natural multitasking
|
|
Multi-screen
|
Single floating window only
|
Multiple stable windows
|
Like having 3–5 extra monitors anywhere
|
|
Head movement
|
Everything moves with you
|
Screens stay where you placed them
|
Feels like real physical displays
|
|
Use cases
|
Simple video mirroring
|
Productivity, gaming, 3D content
|
Significantly more “wow” factor
|
Summarize:
: BB AR glasses + 3DoF give you the best balance of comfort, price, and immersion for everyday spatial multitasking today — virtual screens that actually feel like they exist in your world.Read more
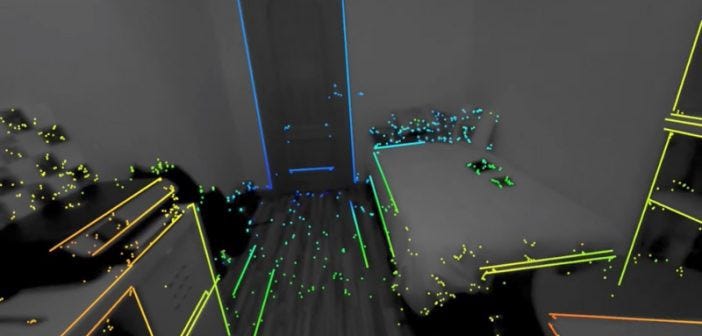
How does the Visual-Inertial Odometry Basics working?
Posted by Technology Co., Ltd Shenzhen Mshilor
- Camera (Visual Odometry / VO): Tracks visual features (corners, edges, textures) across image frames to estimate motion. It provides rich scene context and absolute scale, but struggles with fast motion (blur), low light, textureless areas, or rapid changes.
-
IMU (Gyro + Accelerometer): Delivers high-frequency (100–1000+ Hz) rotation and acceleration data. Perfect for bridging camera frames and handling quick movements, but pure IMU integration causes drift (errors accumulate rapidly).

-
Frontend (Fast Tracking):
- Visual part: Detect and track features between consecutive camera frames (e.g., using ORB, Shi-Tomasi, or learned descriptors).
-
IMU part: Preintegrate high-rate IMU data between frames into compact summaries (Δposition, Δvelocity, Δrotation). This avoids recomputing every IMU sample.
- Prediction: Use IMU to propagate the current pose estimate forward quickly.
-
Backend (Optimization & Fusion):
- Tight coupling (most accurate): Jointly optimize visual reprojection errors (how well tracked features match predictions) and IMU residuals in one optimization problem.
-
Common approaches:
- Filtering-based (e.g., Extended Kalman Filter / MSCKF): Lightweight and real-time.
- Optimization-based (e.g., sliding-window bundle adjustment or factor graphs): More precise, used in systems like ORB-SLAM3 or VINS-Fusion.
- Initialization: Critical — bootstraps scale, gravity direction, and biases using a short motion sequence.
- Optional: Loop closure (recognizing previously seen places) for even lower drift (turns VIO into VI-SLAM).

- IMU-only: Good for orientation (3DoF) but drifts badly in position.
- Visual Odometry alone: Scale-ambiguous (monocular) and brittle during fast motion or low texture.
- VIO: Combines both → accurate, drift-resistant, works in GPS-denied spaces (indoors, AR glasses).
- Stable virtual overlays that stay fixed in 3D space as you walk or turn your head.
- Real-time head + body tracking without external beacons.
- Low-latency response even while moving quickly (the gyroscope shines here for fast rotations).
Read more
- Camera (Visual Odometry / VO): Tracks visual features (corners, edges, textures) across image frames to estimate motion. It provides rich scene context and absolute scale, but struggles with fast motion (blur), low light, textureless areas, or rapid changes.
-
IMU (Gyro + Accelerometer): Delivers high-frequency (100–1000+ Hz) rotation and acceleration data. Perfect for bridging camera frames and handling quick movements, but pure IMU integration causes drift (errors accumulate rapidly).
-
Frontend (Fast Tracking):
- Visual part: Detect and track features between consecutive camera frames (e.g., using ORB, Shi-Tomasi, or learned descriptors).
-
IMU part: Preintegrate high-rate IMU data between frames into compact summaries (Δposition, Δvelocity, Δrotation). This avoids recomputing every IMU sample.
- Prediction: Use IMU to propagate the current pose estimate forward quickly.
-
Backend (Optimization & Fusion):
- Tight coupling (most accurate): Jointly optimize visual reprojection errors (how well tracked features match predictions) and IMU residuals in one optimization problem.
-
Common approaches:
- Filtering-based (e.g., Extended Kalman Filter / MSCKF): Lightweight and real-time.
- Optimization-based (e.g., sliding-window bundle adjustment or factor graphs): More precise, used in systems like ORB-SLAM3 or VINS-Fusion.
- Initialization: Critical — bootstraps scale, gravity direction, and biases using a short motion sequence.
- Optional: Loop closure (recognizing previously seen places) for even lower drift (turns VIO into VI-SLAM).
- IMU-only: Good for orientation (3DoF) but drifts badly in position.
- Visual Odometry alone: Scale-ambiguous (monocular) and brittle during fast motion or low texture.
- VIO: Combines both → accurate, drift-resistant, works in GPS-denied spaces (indoors, AR glasses).
- Stable virtual overlays that stay fixed in 3D space as you walk or turn your head.
- Real-time head + body tracking without external beacons.
- Low-latency response even while moving quickly (the gyroscope shines here for fast rotations).
Read more
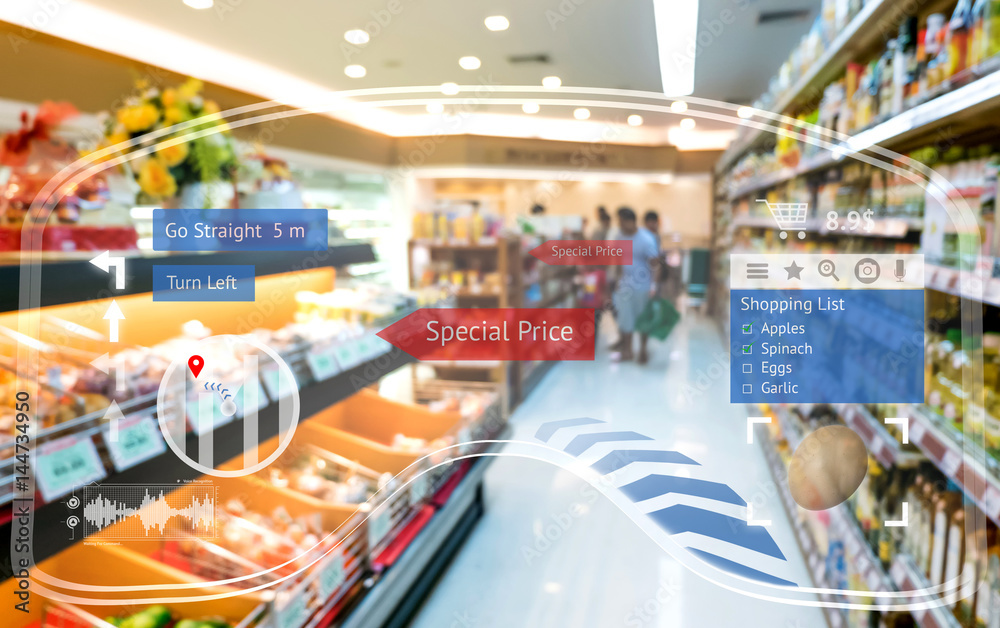
How does the AR Glasses navigation in a mall?
Posted by Technology Co., Ltd Shenzhen Mshilor
Here’s a concrete marker strategy for AR navigation in a mall (optimized for real-world occlusion, long corridors, and re-acquisition).
1) Use 3 layers of references
Layer A — World anchors (primary, for accurate navigation)
Mount large AprilTag/ArUco tags on fixed, hard-to-move structures:
- Elevator cores (elevator bank centerline) — 1 set per core per floor
- Stairwell landing corners — 1 set per stair cluster per floor
- Main junction pillars/wayfinding pillars at corridor intersections
- Main entrances/lobby “origin” points (per floor, if applicable)
Goal: “world lock” so arrows/labels don’t drift onto the wrong storefront.
Layer B — Local anchors (secondary, for turn/door accuracy)
Mount medium tags near:
- Food court entrances
- Restroom zones
- Major store clusters where the user must make a turn
- Information desk/kiosk (optional but great for calibration)
Goal: keep turn guidance stable when global anchors are temporarily occluded.
Layer C — Marker-less fallback (must-have)
Enable SLAM/feature tracking so navigation continues when markers are hidden.
- Your UI should degrade gracefully (next section).
2) Tie markers to a state machine (so UX is safe)
Your app should behave differently based on tracking confidence:
- WORLD_LOCKED: marker detected with good quality → show precise step arrows, distance-to-turn.
- LOCAL_LOCKED: only local anchors visible or SLAM confidence moderate → show direction but reduce “snap/precision”.
- SLAM_ONLY: no markers visible → show high-level guidance (e.g., “approaching restroom area”) and avoid claiming exact alignment.
- RECOVERY: markers were lost → guide user to a nearby anchor zone (“look toward pillar signage”).
This prevents the classic mall problem: occluded tags, SLAM drift, and an arrow that “floats” incorrectly.
3) Placement rules that work in malls
A) Redundancy over density
- Put anchors in pairs/triads within a zone (e.g., two elevator-related anchors per elevator bank).
- Avoid “single points of failure” where the user must see exactly one tag.
B) Height & orientation
- Mount large anchors around 1.7–2.2 m height.
- Keep the tag plane facing the expected camera view direction (generally front-facing relative to where users walk).
C) Coverage logic (practical heuristic)
Per floor, ensure that along the main walking areas:
- Every major corridor section between junctions has at least one chance for a world anchor to be visible
- Every turn decision point has at least one local anchor opportunity
4) Concrete starting counts (per floor)
As a starting design before field testing:
- Large anchors: 6–12 per floor
- Medium anchors: 8–16 per floor
- Then add based on walk-test failures (don’t over-install everywhere up front).
5) Field test acceptance criteria (what to measure)
Perform a “walk-through" for each route and record:
- Re-lock time: how long it takes to return to WORLD_LOCKED after occlusion
- Arrow stability: jitter in position during 30–60 seconds of tracking
- Wrong precision rate: percentage of time you display “exact” overlays without being world-locked
- Detection reliability: success rate of marker detection by zone and distance
Read more
what is tracking type (SLAM vs marker-based)
Posted by Technology Co., Ltd Shenzhen Mshilor
“Tracking type” in AR refers to how the glasses determine the user’s motion and the real-world coordinate system, so that virtual content stays locked to the correct positions.

1) SLAM tracking (Simultaneous Localization and Mapping)
Idea: The glasses create and update a map of the environment while estimating their own position within it.
How it works (high level)
- Use cameras (and often IMU) to detect visual features.
- Estimate the device pose (position + orientation) relative to previously seen features.
- Build/update a 3D map (point cloud, planes, sometimes meshes).
- Use the map to keep anchors stable.
Pros
- Works in many environments (especially those with texture/visual features).
- Doesn’t require pre-built markers or special setup.
- Can support larger spaces because it continuously builds the world model.
Cons/failure modes
- Can drift over time (though modern SLAM reduces this a lot).
- Performance drops in low light, motion blur, or low-texture scenes (blank walls).
- Changes in the environment can reduce stability.
2) Marker-based tracking
Idea: The system recognizes known “targets” (markers) in the scene and uses them to compute pose.
Common marker types:
- Visual fiducials: QR-like patterns, ArUco markers, AprilTags.
- Feature targets: printed images or special tracking cards.
- Visual anchor images: sometimes called image-based tracking (detecting reference pictures).
- UWB/Beacon-based (not visual, but “marker-like” anchors): device measures distance to known beacons.
How it works (high level)
- The camera detects the marker (or reference target).
- The glasses compute pose directly from the detected marker geometry.
- Virtual content is anchored to that marker’s known location.
Pros
- Often very stable and accurate as long as the marker is visible.
- Less computationally heavy than full SLAM in some setups.
- Great for repeatable tasks (training modules, industrial workstations).
Cons/failure modes
- Needs markers/targets present (or pre-installed environments).
- If the marker is occluded, moved, or out of view → tracking can fail or fall back.
- Less flexible for roaming/unknown environments unless you install lots of markers or use many reference targets.
3) When each is typically chosen
- SLAM: general-purpose AR, warehouses you move through, museums, outdoor/varied environments.
- Marker-based: factory assembly stations, labs, classrooms, “put this part here” workflows on fixed fixtures.
4) Hybrid approach (common in real products)
Many systems use both:
- Marker-based when targets are visible (stability/accuracy)
- SLAM when markers aren’t visible (coverage)
5) How to tell them apart in practice
- With SLAM, anchors generally “hold” as you move around, even without markers — until tracking starts to decline.
- With marker-based tracking, it works best when you can see the markers; occlusion or leaving the area often leads to noticeable tracking issues.
Read more
“Tracking type” in AR refers to how the glasses determine the user’s motion and the real-world coordinate system, so that virtual content stays locked to the correct positions.
1) SLAM tracking (Simultaneous Localization and Mapping)
Idea: The glasses create and update a map of the environment while estimating their own position within it.
How it works (high level)
- Use cameras (and often IMU) to detect visual features.
- Estimate the device pose (position + orientation) relative to previously seen features.
- Build/update a 3D map (point cloud, planes, sometimes meshes).
- Use the map to keep anchors stable.
Pros
- Works in many environments (especially those with texture/visual features).
- Doesn’t require pre-built markers or special setup.
- Can support larger spaces because it continuously builds the world model.
Cons/failure modes
- Can drift over time (though modern SLAM reduces this a lot).
- Performance drops in low light, motion blur, or low-texture scenes (blank walls).
- Changes in the environment can reduce stability.
2) Marker-based tracking
Idea: The system recognizes known “targets” (markers) in the scene and uses them to compute pose.
Common marker types:
- Visual fiducials: QR-like patterns, ArUco markers, AprilTags.
- Feature targets: printed images or special tracking cards.
- Visual anchor images: sometimes called image-based tracking (detecting reference pictures).
- UWB/Beacon-based (not visual, but “marker-like” anchors): device measures distance to known beacons.
How it works (high level)
- The camera detects the marker (or reference target).
- The glasses compute pose directly from the detected marker geometry.
- Virtual content is anchored to that marker’s known location.
Pros
- Often very stable and accurate as long as the marker is visible.
- Less computationally heavy than full SLAM in some setups.
- Great for repeatable tasks (training modules, industrial workstations).
Cons/failure modes
- Needs markers/targets present (or pre-installed environments).
- If the marker is occluded, moved, or out of view → tracking can fail or fall back.
- Less flexible for roaming/unknown environments unless you install lots of markers or use many reference targets.
3) When each is typically chosen
- SLAM: general-purpose AR, warehouses you move through, museums, outdoor/varied environments.
- Marker-based: factory assembly stations, labs, classrooms, “put this part here” workflows on fixed fixtures.
4) Hybrid approach (common in real products)
Many systems use both:
- Marker-based when targets are visible (stability/accuracy)
- SLAM when markers aren’t visible (coverage)
5) How to tell them apart in practice
- With SLAM, anchors generally “hold” as you move around, even without markers — until tracking starts to decline.
- With marker-based tracking, it works best when you can see the markers; occlusion or leaving the area often leads to noticeable tracking issues.